 Nexus
Nexus
Nexus支持作为宿主和代理存储库的本地Maven/Docker/npm存储库,可以直接将这些存储库暴露给客户端工具;也可以以存储库组的方式暴露给客户端工具,存储库组是合并了多个存储库的内容的存储库,能够通过一个URL将多个存储库暴露给客户端工具,从而便于用户的使用。通过nexus自建能够有效减少访问获取镜像的时间和对带宽使用。
# 1. 部署
# 1.1 编写yaml
apiVersion: v1
kind: Service
metadata:
  name: nexus3
  labels:
    app: nexus3
spec:
  ports:
    - port: 8081
      targetPort: 8081
  selector:
    app: nexus3
---
apiVersion: apps/v1
kind: StatefulSet
metadata:
  name: nexus3
  labels:
    app: nexus3
spec:
  replicas: 1
  selector:
    matchLabels:
      app: nexus3
  template:
    metadata:
      labels:
        app: nexus3
    spec:
      terminationGracePeriodSeconds: 90
      containers:
      - name: nexus3
        image: docker.cloudimages.asia/sonatype/nexus3
        imagePullPolicy: IfNotPresent
        resources:
          limits:
            cpu: "4000m"
            memory: "4096Mi"
          requests:
            memory: "800Mi"
            cpu: "100m"
        securityContext:
          runAsUser: 0
        ports:
        - containerPort: 8081
        livenessProbe:
          failureThreshold: 3
          httpGet:
            port: 8081
            path: /
          initialDelaySeconds: 120
          periodSeconds: 5
          timeoutSeconds: 3
        readinessProbe:
          failureThreshold: 10
          httpGet:
            port: 8081
            path: /
          initialDelaySeconds: 120
          periodSeconds: 5
          timeoutSeconds: 3
        volumeMounts:
        - name: nexus-data
          mountPath: /nexus-data
      volumes:
        - name: nexus-data
          persistentVolumeClaim:
            claimName: nexus-data-pvc
1
2
3
4
5
6
7
8
9
10
11
12
13
14
15
16
17
18
19
20
21
22
23
24
25
26
27
28
29
30
31
32
33
34
35
36
37
38
39
40
41
42
43
44
45
46
47
48
49
50
51
52
53
54
55
56
57
58
59
60
61
62
63
64
65
66
67
68
2
3
4
5
6
7
8
9
10
11
12
13
14
15
16
17
18
19
20
21
22
23
24
25
26
27
28
29
30
31
32
33
34
35
36
37
38
39
40
41
42
43
44
45
46
47
48
49
50
51
52
53
54
55
56
57
58
59
60
61
62
63
64
65
66
67
68
# 1.2 查看默认密码,登陆后会要求修改密码,按步操作
$ cat /opt/sonatype/sonatype-work/nexus3/admin.password
1
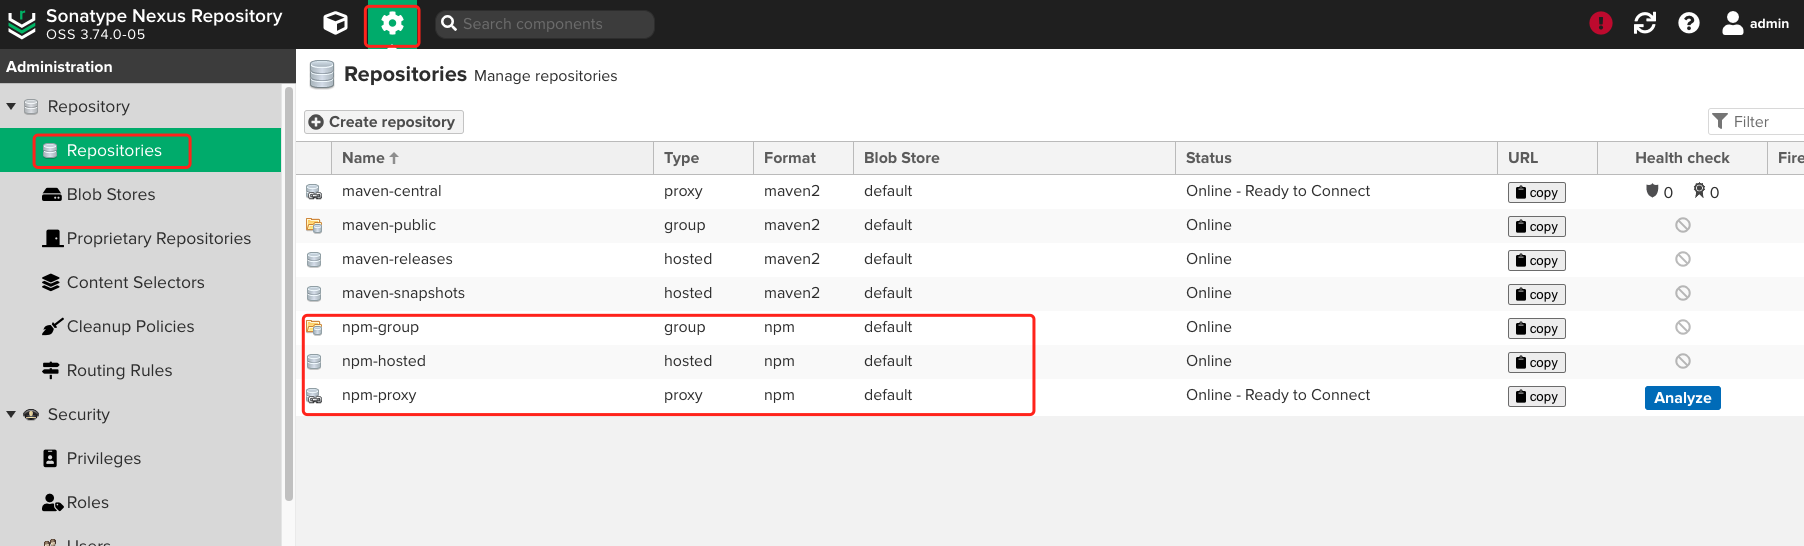
# 2. npm 配置: 阿里云加速站 (opens new window)
# 2.1 NPM-分别创建如下三个repository
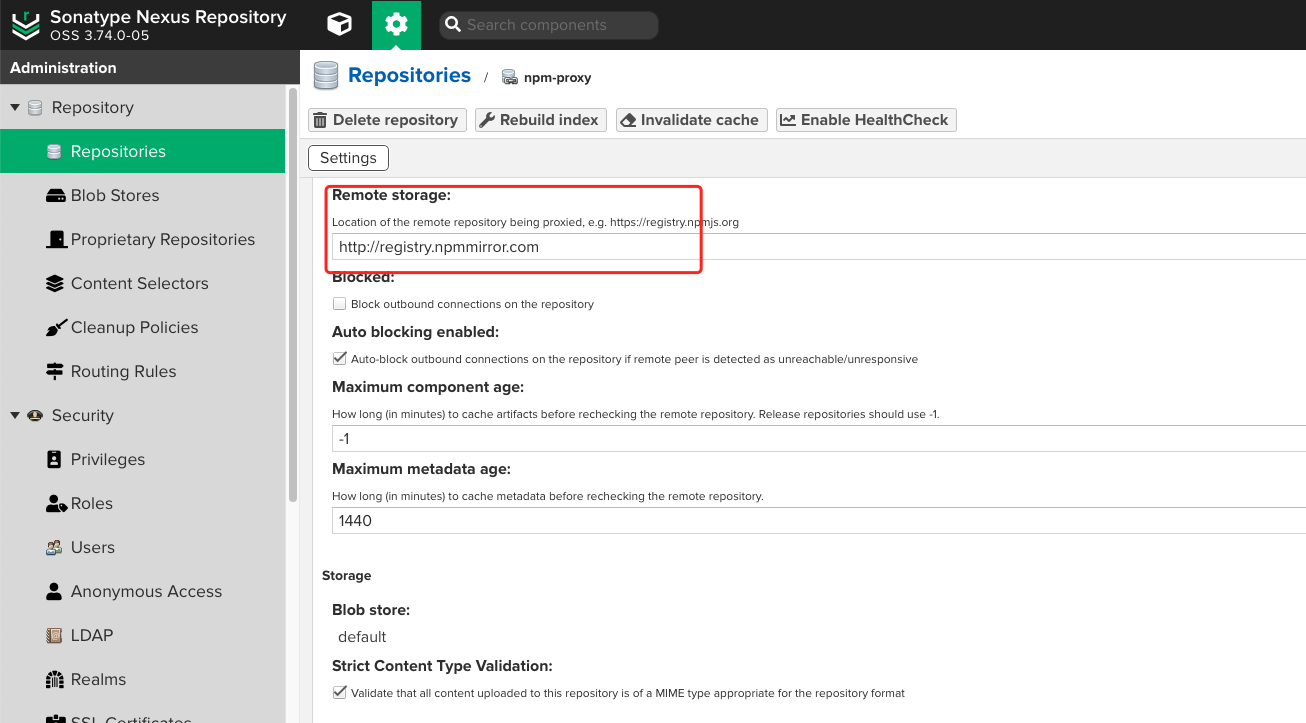
# 2.2 npm-prxoy远程地址
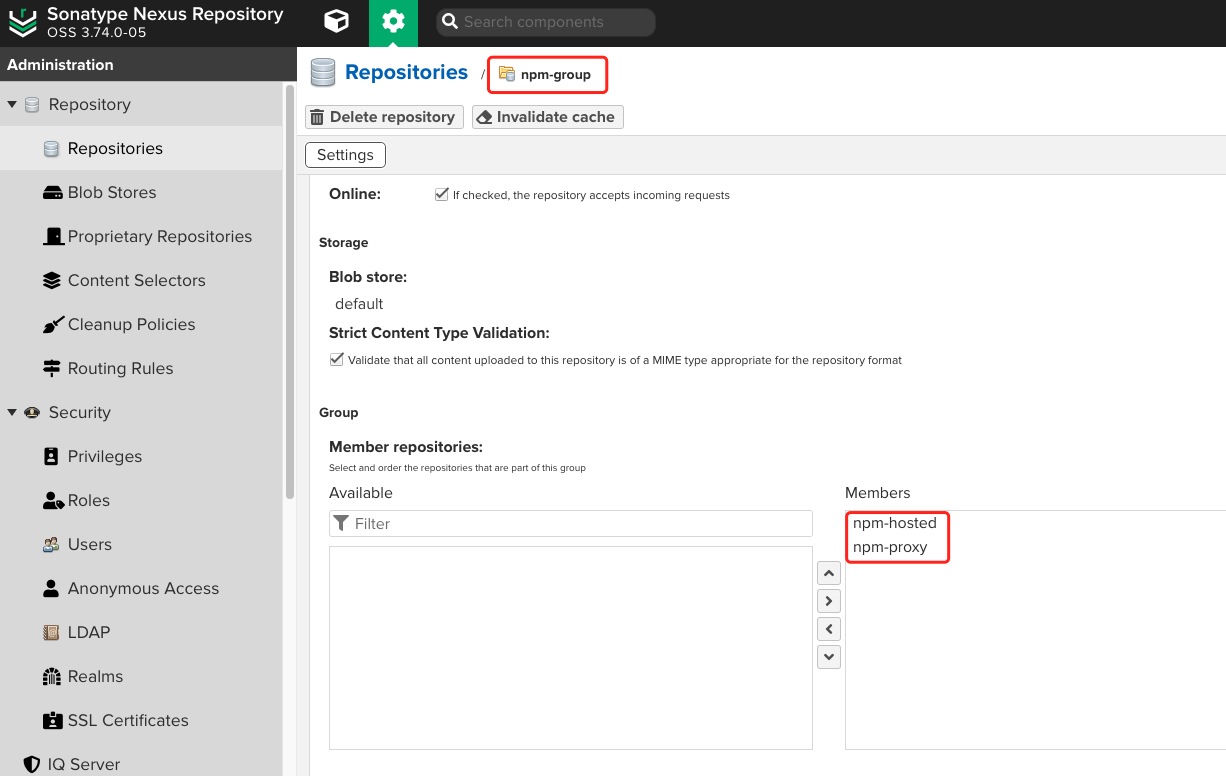
# 2.3 npm-group 的Members添加我们创建的repository
# 2.4 查看当前npm源
[root@manager ~]# npm config get registry
############################### or ###############################
[root@manager ~]# cat  ~/.npmrc
1
2
3
2
3
# 2.5 配置私服地址
[root@manager ~]# npm config set registry http://172.16.0.225:31377/repository/npm-group
1
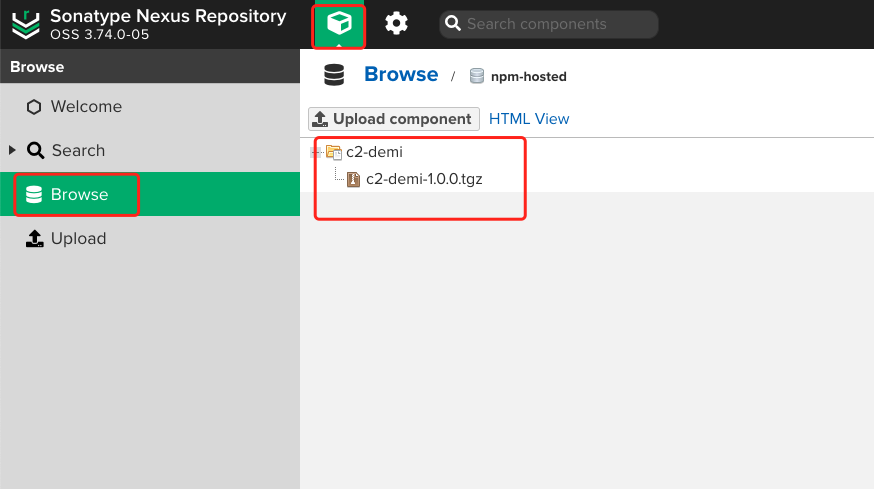
# 2.6 上传依赖,注意npm-hosted策略
[root@manager ~]# mkdir c2-demi && c2-demi
[root@manager ~]# npm init -y && touch index.js
[root@manager ~]# npm login registry="http://172.16.0.225:31377/repository/npm-hosted/"
[root@manager c2-demi]# npm publish
1
2
3
4
2
3
4

# 2.7 验证依赖
[root@manager ~]# npm i -S [email protected] --registry=http://172.16.0.225:31377/repository/npm-group/
up to date in 366ms
1
2
2
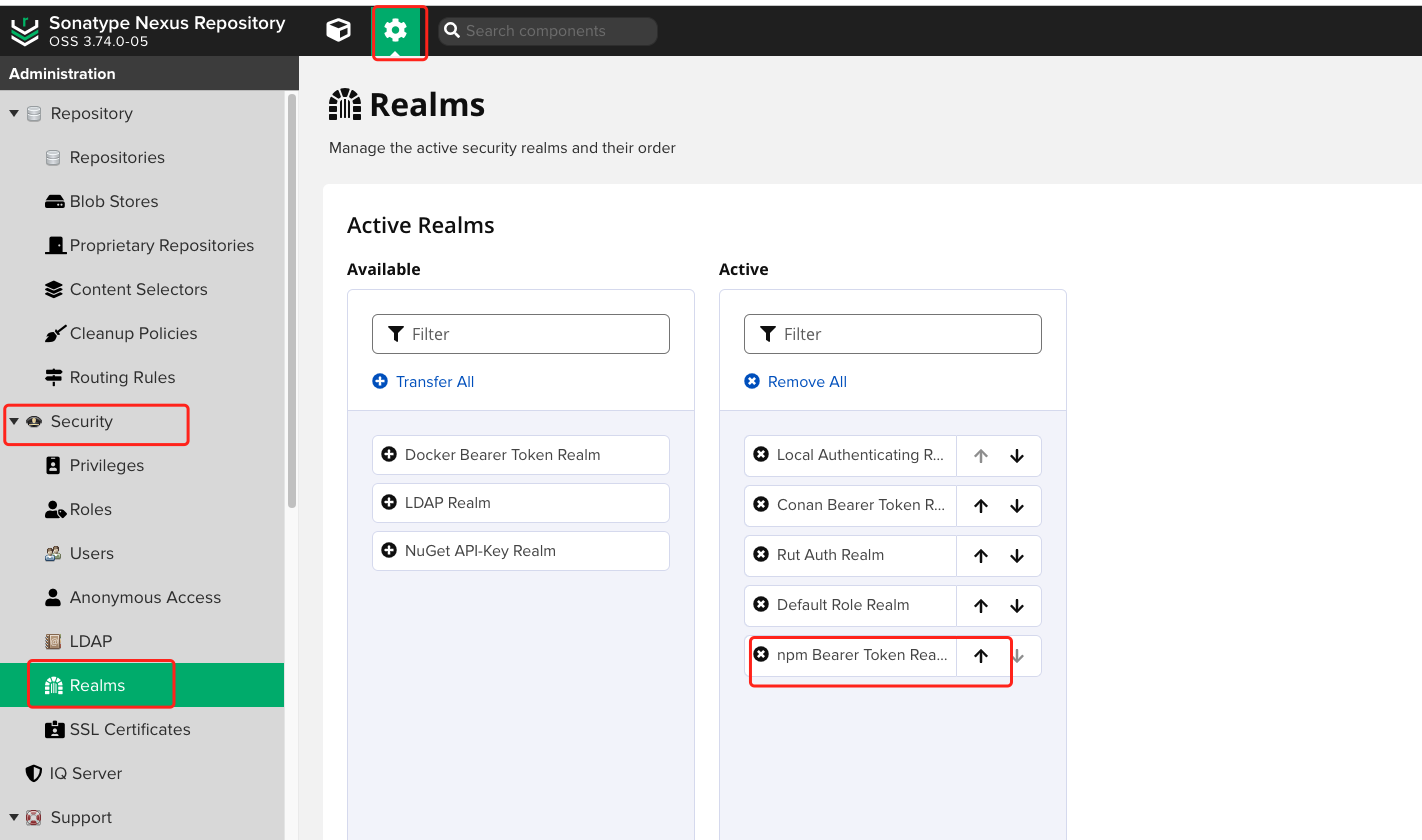
# 2.8 问题:如果遇到如下报错,原因是没有启用 npm Bearer Token Realm 参考下文进行启用即可。
[root@manager c2-demi]# npm publish
npm notice
npm notice 📦  [email protected]
npm notice === Tarball Contents ===
npm notice 0B   index.js
npm notice 221B package.json
npm notice === Tarball Details ===
npm notice name:          c2-demi
npm notice version:       1.0.0
npm notice filename:      c2-demi-1.0.0.tgz
npm notice package size:  269 B
npm notice unpacked size: 221 B
npm notice shasum:        d6875ff3854dddeb68ff197bcbf1adf4682ae234
npm notice integrity:     sha512-MRq7JqunxNgQm[...]ZzY5NL440PDmA==
npm notice total files:   2
npm notice
npm ERR! code E401
npm ERR! Unable to authenticate, need: BASIC realm="Sonatype Nexus Repository Manager"

npm ERR! A complete log of this run can be found in:
1
2
3
4
5
6
7
8
9
10
11
12
13
14
15
16
17
18
19
20
2
3
4
5
6
7
8
9
10
11
12
13
14
15
16
17
18
19
20
# 2.9 nrm管理npm源
# 1.安装nrm
~ npm install -g nrm --registry=https://registry.npmmirror.com/
~ nrm -V
1.3.0
# 2.查看可选的源
~ nrm ls
(node:18148) ExperimentalWarning: stream/web is an experimental feature. This feature could change at any time
(Use `node --trace-warnings ...` to show where the warning was created)
  npm ----------- https://registry.npmjs.org/
  yarn ---------- https://registry.yarnpkg.com/
  tencent ------- https://mirrors.cloud.tencent.com/npm/
  cnpm ---------- https://r.cnpmjs.org/
* taobao -------- https://registry.npmmirror.com/
  npmMirror ----- https://skimdb.npmjs.com/registry/
  huawei -------- https://repo.huaweicloud.com/repository/npm/
# 3.增加源
 ~ nrm add npm-hosted http://172.16.0.225:31377/repository/npm-hosted/
# 4.切换源
 ~ nrm use npm-hosted
(node:18308) ExperimentalWarning: stream/web is an experimental feature. This feature could change at any time
(Use `node --trace-warnings ...` to show where the warning was created)
 SUCCESS  The registry has been changed to 'npm-hosted'.
# 5.查看
 ~ nrm ls
(node:18317) ExperimentalWarning: stream/web is an experimental feature. This feature could change at any time
(Use `node --trace-warnings ...` to show where the warning was created)
  npm ----------- https://registry.npmjs.org/
  yarn ---------- https://registry.yarnpkg.com/
  tencent ------- https://mirrors.cloud.tencent.com/npm/
  cnpm ---------- https://r.cnpmjs.org/
  taobao -------- https://registry.npmmirror.com/
  npmMirror ----- https://skimdb.npmjs.com/registry/
  huawei -------- https://repo.huaweicloud.com/repository/npm/
* npm-hosted ---- http://172.16.0.225:31377/repository/npm-hosted/
# 6.删除源
➜  ~ nrm del npm-hosted
(node:18702) ExperimentalWarning: stream/web is an experimental feature. This feature could change at any time
(Use `node --trace-warnings ...` to show where the warning was created)
 SUCCESS  The registry 'npm-hosted' has been deleted successfully.
 SUCCESS  The registry has been changed to 'npm'.
➜  ~ nrm ls
(node:18712) ExperimentalWarning: stream/web is an experimental feature. This feature could change at any time
(Use `node --trace-warnings ...` to show where the warning was created)
* npm ---------- https://registry.npmjs.org/
  yarn --------- https://registry.yarnpkg.com/
  tencent ------ https://mirrors.cloud.tencent.com/npm/
  cnpm --------- https://r.cnpmjs.org/
  taobao ------- https://registry.npmmirror.com/
  npmMirror ---- https://skimdb.npmjs.com/registry/
  huawei ------- https://repo.huaweicloud.com/repository/npm/
1
2
3
4
5
6
7
8
9
10
11
12
13
14
15
16
17
18
19
20
21
22
23
24
25
26
27
28
29
30
31
32
33
34
35
36
37
38
39
40
41
42
43
44
45
46
47
48
49
50
2
3
4
5
6
7
8
9
10
11
12
13
14
15
16
17
18
19
20
21
22
23
24
25
26
27
28
29
30
31
32
33
34
35
36
37
38
39
40
41
42
43
44
45
46
47
48
49
50
# 3. Maven 配置: 阿里云加速站 (opens new window)
# 3.1 安装maven
[root@test-169 ~]# wget https://dlcdn.apache.org/maven/maven-3/3.9.9/binaries/apache-maven-3.9.9-bin.tar.gz
[root@test-169 ~]# tar xf apache-maven-xxx-bin.tar.gz
[root@test-169 ~]# mv apache-maven-3.9.9 /usr/local/apache-maven
[root@test-169 ~]# mkdir -p /data/repository
1
2
3
4
2
3
4
# 3.2 配置maven本地缓存目录以及阿里云加速
[root@test-169 ~]# cat  /usr/local/apache-maven/conf/settings.xml
<?xml version="1.0" encoding="UTF-8"?>
<settings
    xmlns="http://maven.apache.org/SETTINGS/1.2.0"
    xmlns:xsi="http://www.w3.org/2001/XMLSchema-instance"
          xsi:schemaLocation="http://maven.apache.org/SETTINGS/1.2.0 https://maven.apache.org/xsd/settings-1.2.0.xsd">
    <localRepository>/data/repository</localRepository>
    <proxies></proxies>
    <servers></servers>
    <mirrors>
        <mirror>
            <id>aliyunmaven</id>
            <mirrorOf>*</mirrorOf>
            <name>阿里云公共仓库</name>
            <url>https://maven.aliyun.com/repository/public</url>
        </mirror>
    </mirrors>
    <profiles></profiles>
</settings>
1
2
3
4
5
6
7
8
9
10
11
12
13
14
15
16
17
18
19
2
3
4
5
6
7
8
9
10
11
12
13
14
15
16
17
18
19
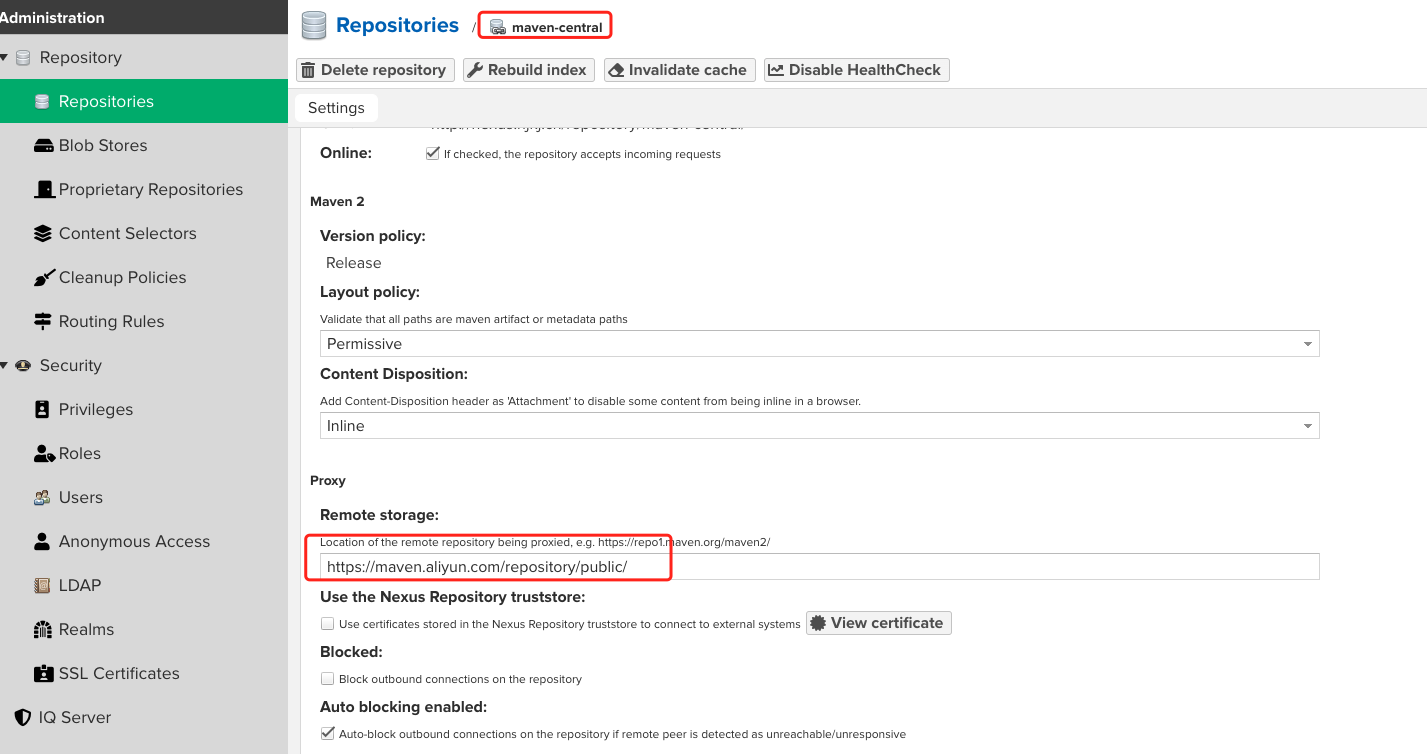
# 3.3 nexus配置maven,分别创建下面四个repositories

# 3.4 maven配置阿里云加速代理
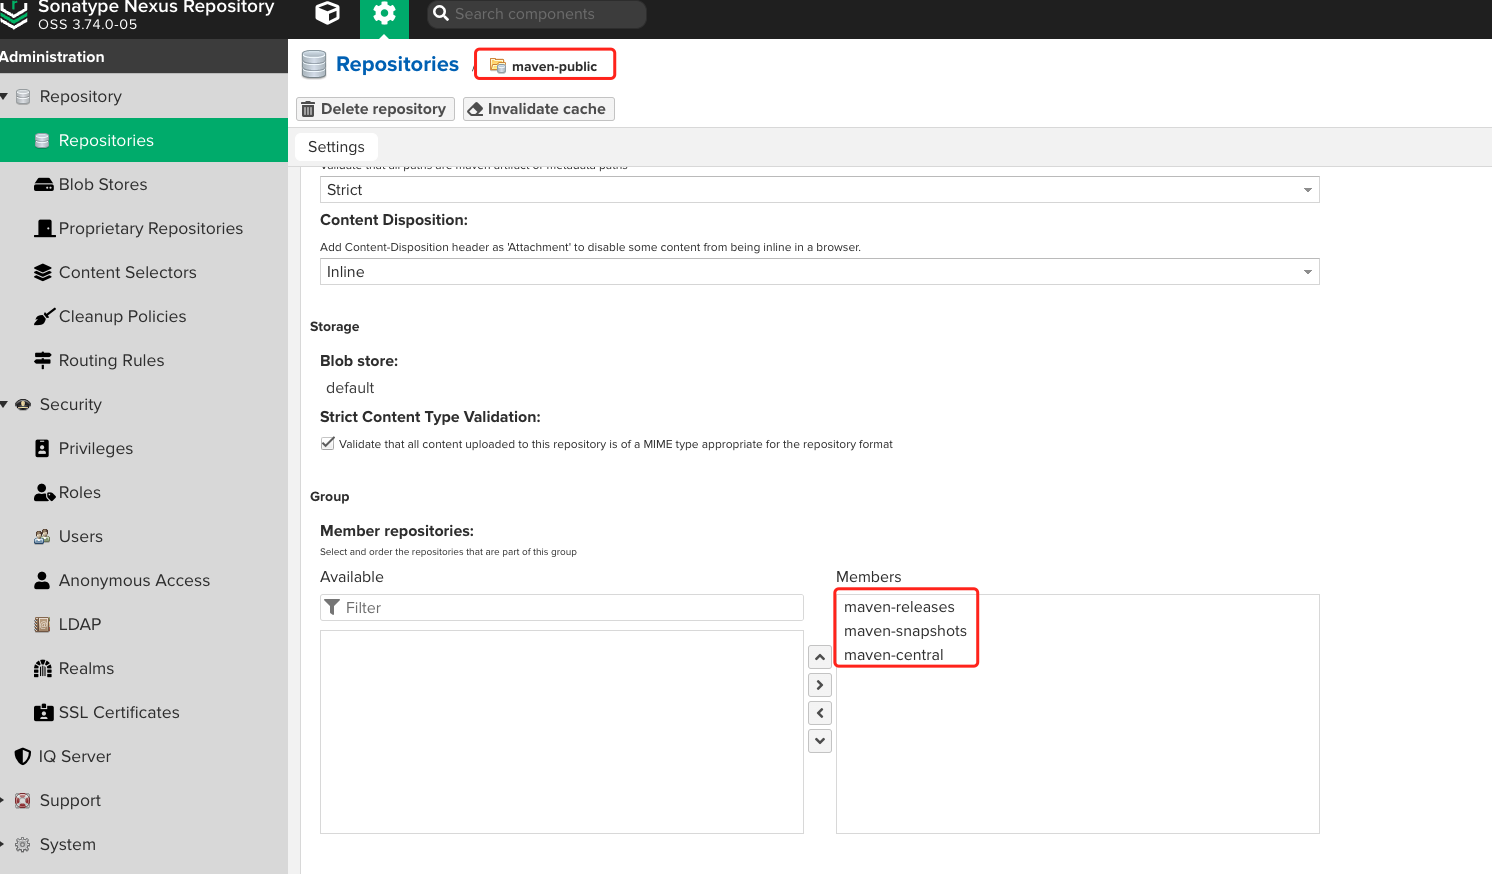
# 3.5 maven-public的Members添加我们创建的repository
# 3.6 maven配置私服,username、password和url改成自己对应的
[root@test-169 ~]# cat  /usr/local/apache-maven/conf/settings.xml
<?xml version="1.0" encoding="UTF-8"?>
<settings
    xmlns="http://maven.apache.org/SETTINGS/1.0.0"
    xmlns:xsi="http://www.w3.org/2001/XMLSchema-instance"
	xsi:schemaLocation="http://maven.apache.org/SETTINGS/1.0.0 http://maven.apache.org/xsd/settings-1.0.0.xsd">
    <localRepository>/data/repository</localRepository>
    <pluginGroups></pluginGroups>
    <proxies></proxies>
    <servers>
        <server>
            <id>releases</id>
            <username>admin</username>
            <password>password</password>
        </server>
        <server>
            <id>snapshots</id>
            <username>admin</username>
            <password>password</password>
        </server>
    </servers>
    <mirrors>
        <mirror>
            <id>nexus</id>
            <mirrorOf>*</mirrorOf>
            <url>http://nexus.demo.com/repository/maven-public/</url>
        </mirror>
    </mirrors>
    <profiles>
        <profile>
            <id>all</id>
            <repositories>
                <repository>
                    <id>nexus</id>
                    <url>http://nexus.demo.com/repository/maven-public/</url>
                    <releases>
                        <enabled>true</enabled>
                        <updatePolicy>always</updatePolicy>
                    </releases>
                    <snapshots>
                        <enabled>true</enabled>
                        <updatePolicy>always</updatePolicy>
                    </snapshots>
                </repository>
            </repositories>
        </profile>
    </profiles>
    <activeProfiles>
        <activeProfile>all</activeProfile>
    </activeProfiles>
</settings>
1
2
3
4
5
6
7
8
9
10
11
12
13
14
15
16
17
18
19
20
21
22
23
24
25
26
27
28
29
30
31
32
33
34
35
36
37
38
39
40
41
42
43
44
45
46
47
48
49
50
51
2
3
4
5
6
7
8
9
10
11
12
13
14
15
16
17
18
19
20
21
22
23
24
25
26
27
28
29
30
31
32
33
34
35
36
37
38
39
40
41
42
43
44
45
46
47
48
49
50
51
# 4. nexus权限配置 (opens new window)
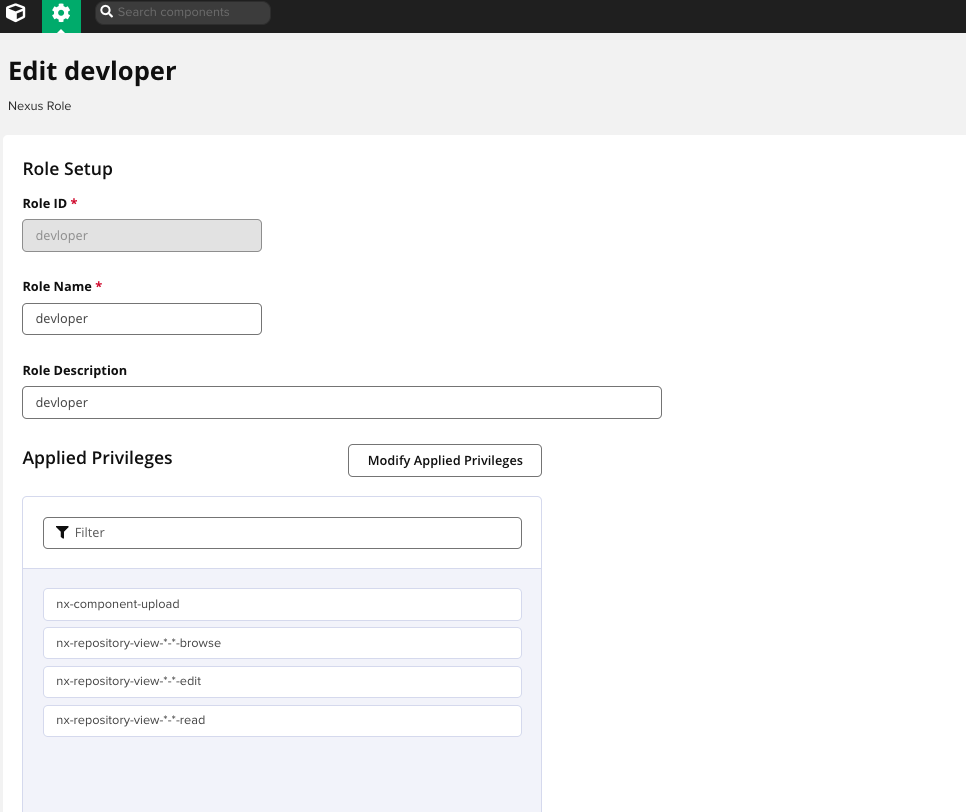
# 4.1 在Nexus管理页面,依次点击Security>Roles>Create Role>Role Type>Nexus role:
# 4.2 点击Users>Create user:
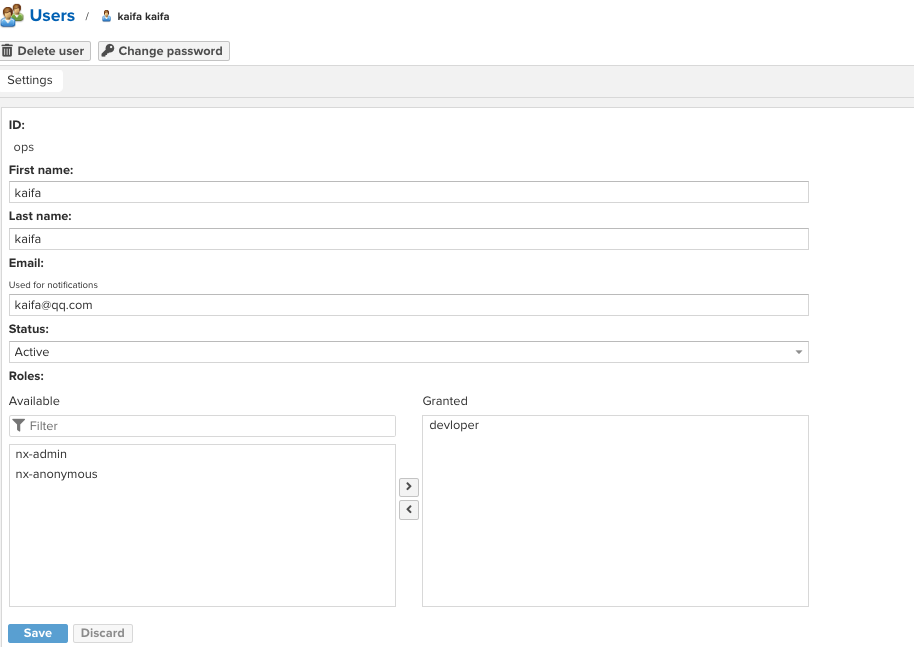
# 4.3 角色权限已配置好,仅有查看、上传权限,快去试试吧!
上次更新: 2025/04/25, 03:40:17